


Aditivos para concreto leve | Agentes espumantes de alto desempenho para concreto celular

Have you ever stared at a technical data sheet for RDP powder and felt more confused than when you started? Você não está sozinho. Os números da temperatura de transição vítrea, minimum film-forming temperature, and tensile adhesion strength can look like a foreign language. A wrong reading here means a failed batch of tile adhesive or a cracked self-leveling underlayment. That costs money. It costs time. It hurts your reputation.

I have spent over two decades in this industry. I have seen master formulators panic over a single percentage point in dosage. I have also seen beginners read a data sheet correctly on their first try and create a perfect mortar. This guide is for you. We will walk through every critical line on an RDP pó manufacturer technical data sheet, passo a passo. No final, you will make confident, informed decisions for your formulations.
What Exactly Is RDP Powder and Why Does Its Data Sheet Matter?
Redispersible polymer pó (PDR) is the secret ingredient in modern dry-mix mortars. It is a thermoplastic polymer resin, traditionally vinyl acetate ethylene (PÉS). The manufacturer spray-dries it into a fine powder. When you mix it with water in your mortar, it ‘re-disperses’ back into a latex. This latex film strengthens your mortar, improves adhesion to difficult substrates, and increases flexibility.
The technical data sheet is the manufacturer’s promise sobre what that specific powder will do. Ignoring it is like flying a plane without instruments. Let’s learn to read them.
1. Start with the Basics: Polymer Type and Physical Form
Etapa 1: Identify the polímero backbone. Look for the chemical family. Most RDPs are VAE (Etileno acetato de vinil). Some use Acrylics or Vinyl Versatate (VeoVa). The polymer type dictates the base properties. VAE offers a great balance of adhesion and flexibility for general construction. Acrylics provide better UV resistance for exterior systems. The data sheet will always state this in the ‘Product Description’ section.
Etapa 2: Check the physical appearance. It should state ‘white to off-white free-flowing powder.’ If it says ‘lumpy’ or ‘with agglomerates,’ that is a red flag for poor storage or a damaged batch. O densidade aparente is usually between 400 e 600 g/l. This number is critical for logistics and packaging design. A lower bulk density powder takes up more volume in your mixer.
| Propriedade | Valor típico | Por que é importante |
|---|---|---|
| Aparência | Pó branco a esbranquiçado | Visual quality check |
| Densidade aparente | 400 – 600 g/l | Impacts bag fill volume and mixing behavior |
| Conteúdo Sólido | 98 – 99% | Higher means fewer inert fillers; better performance per gram |
2. Decipher the Thermal Properties: Tg and MFFT
These are the two most misunderstood numbers on an RDP powder manufacturer technical data sheet. Get them right, and your mortar behaves beautifully. Get them wrong, and your material fails in the field.
Understanding Glass Transition Temperature (Tg)
Etapa 2.1: Locate the Tg value. This is the temperature at which the polymer transitions from a hard, glassy state to a soft, rubbery state. It is measured in °C. A high Tg (por exemplo, +20°C) means a stiff, tough film at room temperature. A low Tg (por exemplo, -10°C) means a very flexible, soft film.
Etapa 2.2: Match Tg to your application. For a tile adhesive on a balcony that sees freezing winters, you need a low Tg powder (around -5°C to -15°C). For a self-leveling underlayment indoors, a medium Tg (0°C to +10°C) is often sufficient. The data sheet’s ‘Application’ section will guide you, but now you know why.
Mastering Minimum Film-Forming Temperature (TMF)
Etapa 2.3: Find the MFFT value. This number is often close to the Tg but can be slightly higher. MFFT is the lowest temperature at which the polymer particles will coalesce into a continuous film. If your jobsite temperature is below the MFFT, the polymer will not form a film. Your mortar will be chalky and weak.
Etapa 2.4: Make the practical connection. If your data sheet says MFFT = 5°C, you must not apply that mortar when the substrate or air temperature is below 5°C. Ponto final. This is non-negotiable for performance. Many failures come from ignoring this single number.
3. Performance Parameters: What the Numbers Promise
Now we get into the real-world behavior. Every RDP powder manufacturer technical data sheet lists mechanical properties. Here is how to read them without guessing.
Tensile Adhesion Strength (In the Context of Mortar)
Etapa 3.1: Look for the standard test method. It will be either a ‘fresh’ teste, an ‘aged’ teste (heat aging), or a ‘wet’ teste (imersão em água). The most important value for tile adhesives is the adhesion after water immersion. A good general-purpose RDP will show adhesion values of 0.5 para 1.0 N/mm² after 7 days dry and 14 days water immersion.
Etapa 3.2: Compare values across manufacturers. Manufacturer A claims 0.8 N/mm². Manufacturer B claims 0.6 N/mm². But check the test conditions. Did they use the same mortar formulation? The same cement type? The data sheet should reference a standard like EN 12004 or ISO 13007. If it doesn’t, ask why.
Flexural Strength and Abrasion Resistance
Para bases autonivelantes, flexural strength is king. Look for values above 2.0 N/mm² for high-traffic commercial areas. For industrial floors, abrasion resistance is critical. The data sheet might report it as ‘mass loss in grams’ after a test cycle. Lower mass loss equals better durability.
4. Dosagem: The Sweet Spot Between Performance and Cost
Every data sheet gives a ‘Recommended Dosage’ range. This is the most common mistake point for new formulators. You think ‘more is stronger.’ Sometimes true. Muitas vezes, it is a waste of money.
Etapa 4.1: Start in the middle of the range. If the sheet says 2% para 5% em peso de cimento, começar em 3.5%. Mix a test batch.
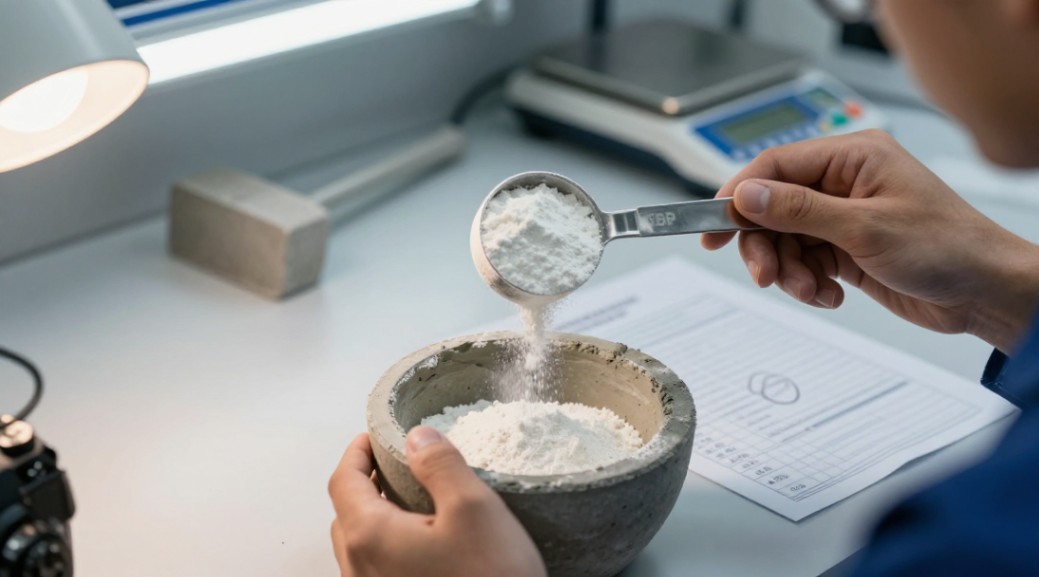
Etapa 4.3: Decrease dosage for maximum strength. Higher polymer content can sometimes lower compressive strength. For a wear layer, you might go down to 2% to keep surface hardness high. The data sheet will show a graph of ‘adhesion vs. dosagem’ or ‘flexural strength vs. dosagem’ if you look carefully. Use that graph.
| Aplicativo | Typical RDP Dosage (% of Cement) | Benefício Primário |
|---|---|---|
| Adesivo para cerâmica | 3 – 5% | Adhesion and flexibility |
| Self-Leveling Underlayment | 2 – 4% | Flow and crack resistance |
| EIFS Base Coat | 4 – 6% | Impact resistance and weatherproofing |
| Exterior Plaster/Stucco | 1.5 – 3% | Water repellency and flexibility |
5. Mixing, Dispersão, and Re-Dispersibility
An RDP powder manufacturer technical data sheet must include mixing guidelines. Follow them exactly. Do not just dump powder into water.
Etapa 5.1: The dispersion procedure. Always add the RDP powder to the other dry ingredients primeiro. Mix them thoroughly for at least 30 segundos. Então add the water. This prevents the polymer from ‘balling up’ or ‘fish-eyeing.’
Etapa 5.2: Check the water-to-powder ratio. The sheet will give a range (por exemplo, 0.22:1 para 0.26:1 por peso). Comece baixo. Add water slowly. The RDP increases the thickener demand, so you might need more water than in a non-modified mix.
Etapa 5.3: The re-dispersibility test. The data sheet may report a ‘grinding residue’ or ‘screen residue’ value. This is the amount of material that does not re-disperse. A good RDP has less than 1% residue on a 200-micron screen. High residue means poor film formation and weak mortar.
6. Armazenar, Prazo de validade, and Safety
Neglecting storage conditions is the fastest way to ruin an expensive drum of powder.
Etapa 6.1: Temperature limits. The data sheet will state ‘Store in a cool, lugar seco’ and often a maximum temperature (por exemplo, 30°C or 40°C). Do not store RDP powder in direct sunlight or near a furnace. High temperature can cause premature film formation inside the bag.
Etapa 6.2: Moisture is the enemy. The powder is hygroscopic. The data sheet will warn about keeping it sealed. An open bag left in a humid environment will clump. Once it clumps, its dispersibility drops dramatically.
Etapa 6.3: Prazo de validade. Most manufacturers guarantee 6 para 12 months from the date of manufacture. The ‘Manufacturing Date’ or ‘Best Before’ line on the data sheet is your friend. Rotate your stock. Old RDP may still work, but its performance may degrade.
Etapa 6.4: Safety first. Every RDP powder manufacturer technical data sheet should reference a Material Safety Data Sheet (MSDS). Fine polymer dust is a respiratory irritant and can be a dust explosion hazard. Always use dust masks and ensure ventilation. The data sheet will state the necessary PPE (Personal Protective Equipment).
7. Compatibilidade: Making It Work with Your Other Ingredients
An RDP does not work alone. It interacts with cement, enchimentos, e outras misturas, especially cellulose ethers (HPMC, HEMC).
Etapa 7.1: Cement compatibility. Most RDPs are compatible with Ordinary Portland Cement (OPC), white cement, and calcium aluminate cement. No entanto, if you use high-alumina cement or specific pozzolans, check the data sheet. Some polymers hydrolyze in high-pH environments.
Etapa 7.2: Interaction with cellulose ethers. Cellulose ethers improve water retention. RDP melhora a adesão. They are synergistic, but they also compete for water. If your formulation feels too sticky or ‘gummy,’ your RDP dosage might be too high relative to your HPMC. The data sheet will not tell you the recipe, but it will give you a ballpark range for compatible systems.
Seu próximo passo: Compare, Teste, and Succeed
You now have the knowledge to read any RDP powder manufacturer technical data sheet with confidence. Do not just read one manufacturer’s sheet. Collect three or four. Put them side-by-side. Compare the Tg, TMF, adhesion values, and storage conditions.
Run a simple test. Use a standard mortar recipe. Change only the RDP. Test the workability by hand. Test the adhesion on a tile. See the difference for yourself. The data sheet is a map. You are the explorer. Trust your hands and your eyes, guided by this document.
You have this. Start reading those data sheets today with a fresh perspective. Your next batch of mortar will be your best yet.
Fornecedor
ConcreteAndMore é um fornecedor global confiável de aditivos para concreto e produtos químicos para construção de alto desempenho. Com anos de experiência no setor, somos especializados em fornecer soluções inovadoras, incluindo superplastificantes de policarboxilato, fibras de concreto, antiespumantes, agentes espumantes, e produtos avançados de isolamento térmico de aerogel. Se você estiver interessado em aditivo para concreto, não hesite em contactar-nos!